
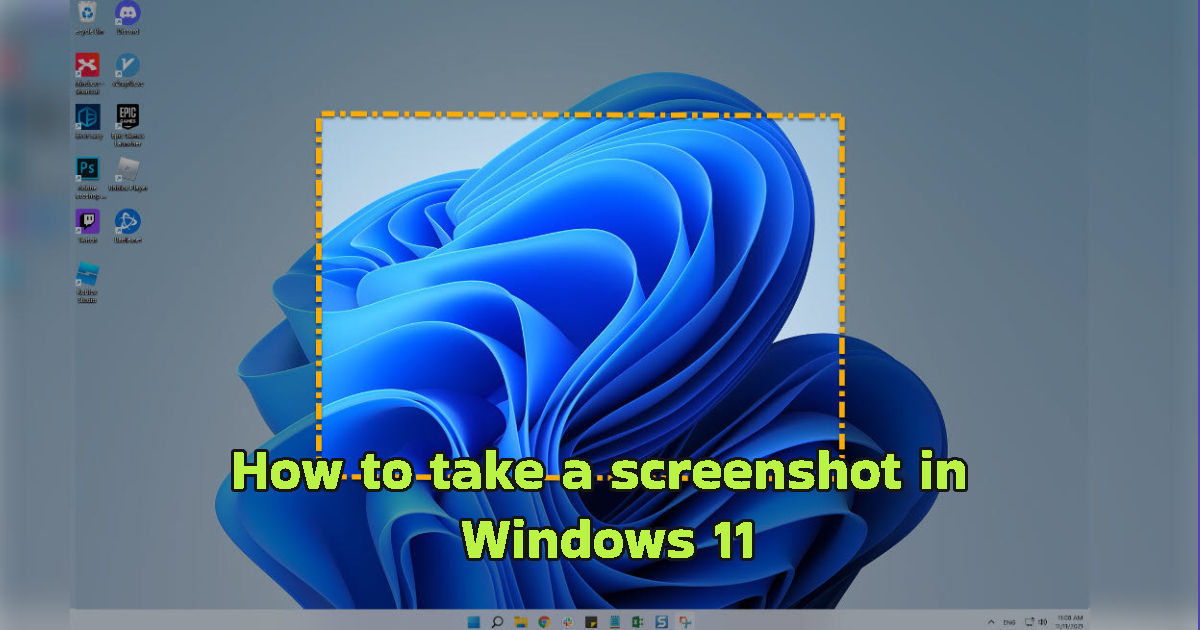
Introduction
Taking screenshots is an essential skill for users of computers, especially those using Windows operating systems. Whether it’s for sharing information, documenting issues, or simply capturing moments, mastering the art of taking screenshots can greatly enhance one’s productivity.
Importance of Taking Screenshots on PC
Screenshots serve a critical function in today’s digital landscape. They allow users to easily share visual information, which is particularly useful in professional settings. For instance, when troubleshooting technical issues, a clear screenshot can provide context that words alone might lack. This visual aid can help in conveying complex information, making it easier for others to understand the problem being encountered. Additionally, screenshots are invaluable for documentation purposes. They enable users to keep a record of what is displayed on their screens, whether that involves saving evidence of transactions or capturing important conversations. Furthermore, in an era where remote collaboration is becoming increasingly common, the ability to take and share screenshots can facilitate clearer communication among team members, allowing them to visually engage with each other’s work.
Benefits of Using Snipping Tool
The Snipping Tool is a built-in feature in Windows that makes capturing screenshots not only easy but also versatile. Users can choose different capture modes: freeform, rectangular, window, or full screen, depending on their needs. This flexibility allows for tailored documentation. For example, a user might want to highlight an error message in a specific software window or take a full-screen capture of a completed project.
The Snipping Tool also includes annotation options, enabling users to write or draw on captured images. This feature is particularly beneficial for educators and trainers who might want to emphasize certain points in their visuals. Moreover, the Snipping Tool provides a user-friendly interface, making it accessible even for those who might not be tech-savvy. The ability to save, share, and directly edit screenshots within the application enhances its functionality, unlike using a simple screenshot capture method that requires additional steps for editing or sharing. Additionally, users can leverage keyboard shortcuts to streamline the process of taking screenshots, increasing efficiency in their tasks. Thus, using the Snipping Tool not only simplifies the act of capturing images but also empowers users to communicate more effectively through visuals.
Shortcut Key Method
Press Windows logo key + Shift + S
One effective way to capture a portion of your screen in Windows is by using the keyboard shortcut that involves the Windows logo key, the Shift key, and the S key. When executed together, this combination will cause the screen to dim slightly, and a crosshair cursor will appear. Users can then click and drag the cursor to select the specific area they want to screenshot. This method allows for precise selection and is especially useful when the user only needs a part of the screen rather than the full display. Once the user releases the mouse button, the selected area is copied to the clipboard, ready to be pasted into applications such as Paint, Word, or any other software that accepts images.
Press Print Screen (PrtSc)
Another popular method for taking screenshots in Windows is by simply pressing the Print Screen button, often abbreviated as PrtSc on keyboards. This button typically resides in the upper right section of the keyboard. Pressing it captures the entire screen and saves it to the clipboard immediately. Users can then open an image editing program, such as Paint or Photo, and paste the screenshot using Ctrl + V. This method is quick and efficient for capturing everything displayed on the screen, but it requires an additional step to save the image to a file. If users want to capture only the currently active window, they can hold down the Alt key while pressing PrtSc. This action will copy just that window to the clipboard for easy pasting.
These shortcut key methods are simple yet powerful tools for anyone who frequently needs to capture visuals from their screens. Whether documenting an error message, sharing information, or simply saving content, these shortcuts enhance the overall productivity of tasks involving screen captures.
Snipping Tool Overview
Understanding the Snipping Tool Interface
The Snipping Tool is a built-in application in Windows 10 and Windows 11 that provides users with a simple way to take screenshots. Upon opening the tool, users are greeted with a clean and intuitive interface. The main screen displays the capture options prominently, allowing easy access to various snipping modes. The top area of the window features buttons such as “New,” “Mode,” and “Delay,” giving users quick access to initiate a screenshot or select different snipping methods. In the Snipping Tool window, there is also a toolbar for editing the captured snips, allowing users to annotate their screenshots using pens, highlighters, and customizable shapes. Additionally, the interface includes options to save, copy, or share the taken screenshots directly, streamlining the process of handling images.
Different Snip Types Available
The Snipping Tool offers five distinct types of snips, providing flexibility depending on the user’s specific needs. The “Freeform Snip” option allows users to draw an irregular shape around the desired area, making it useful for capturing non-rectangular content. The “Rectangular Snip” enables users to create rectangular selections, letting them precisely define the capture area by clicking and dragging the cursor. For those who want to capture specific windows, the “Window Snip” mode allows users to select an open window, like a dialog box, ensuring that only that window is included in the screenshot. The “Full-Screen Snip” captures everything displayed on the screen, essentially taking a complete snapshot of the entire desktop. Lastly, the “Video Snip” function includes the ability to record a portion of the screen, allowing users to capture dynamic content as well. Each type of snip allows users to easily share important information or details from their screens, enhancing communication in both personal and professional settings.
Capturing Full Screen
Using Freeform Snip
The Freeform Snip option in the Snipping Tool allows users to create a custom-shaped screenshot by drawing around the area of interest. To use this feature, they first need to open the Snipping Tool and select Freeform Snip mode. Once activated, the user can click and drag the mouse to outline the desired section. This flexibility is particularly advantageous for capturing irregular shapes or specific objects on the screen. Once the snip is created, it appears in the Snipping Tool window, allowing for further annotations or modifications. Users can use tools such as pens or highlighters to add notes or emphasize certain parts of the image before saving or sharing it. The Freeform Snip option caters to those who require creative freedom in their screenshot captures, making it ideal for a variety of professional and educational applications.
Utilizing Rectangular Snip
The Rectangular Snip feature serves as a straightforward method for capturing a rectangular section of the screen. After launching the Snipping Tool, users select the Rectangular Snip mode, enabling them to click and drag over the desired area. This method is efficient for capturing specific portions of a document, image, or webpage without the clutter of surrounding content. Once the rectangular area is selected and released, the screenshot will be displayed in the Snipping Tool interface for review. Here, users can add annotations, crop the image, or utilize other editing tools to highlight important information. After customization, the snip can be saved or shared easily. The Rectangular Snip option is favored for its simplicity and effectiveness, making it a popular choice among individuals seeking precise and professional captures of their screens.
In both Freeform and Rectangular Snip modes, users have the advantage of quickly saving their work to various file formats, ensuring that screenshots can be easily shared with colleagues, friends, or for personal use. With these features, the Snipping Tool becomes a valuable asset for anyone who regularly takes screenshots, providing versatile options that meet diverse needs.
Capturing Specific Areas
Window Snip Option
The Window Snip option in the Snipping Tool allows users to capture screenshots of specific application windows. This feature is particularly useful for individuals who want to grab content from open applications without including any unnecessary background or other items on the screen. To utilize this function, a user simply needs to open the Snipping Tool and select the Window Snip mode. Once activated, the tool presents a list of open windows. The user can then click on the desired window, and the Snipping Tool captures the entire content of that window. The captured image appears in the Snipping Tool interface for further editing or annotation. This method ensures clarity and precision, as it focuses solely on the selected window, eliminating any distractions from other open applications. Ideal for presentations or technical support, the Window Snip option promotes more professional documentation by providing clean, focused screenshots that convey essential information effectively.
Selecting Custom Shapes with Snipping Tool
In addition to the standard shapes, users of the Snipping Tool can also take advantage of selecting custom shapes for area capture. This functionality complements the various snip types and enhances the user’s ability to tailor their screenshots according to specific requirements. By opting for the Freeform Snip mode, a user can draw any shape around the area they want to capture. This is especially beneficial for creating irregularly shaped captures that highlight particular details in a complex image or document. Once the Freeform option is selected, users can seamlessly click and drag their mouse to outline the desired section. After releasing the mouse button, the snippet is generated and opens within the Snipping Tool for additional editing. To draw attention to important elements, users have access to tools that allow them to write or draw around the snipped image. By incorporating custom shapes into their screenshot routine, users gain creative flexibility, making this feature excellent for educational and creative contexts, where personalized visuals can significantly enhance understanding and communication.
Editing and Annotating
Adding Annotations to Screenshots
The Snipping Tool provides users with a set of annotation tools that can enhance their screenshots. After capturing an image, users have the ability to utilize features such as the Pen and Highlighter tools. The Pen tool allows for writing or drawing directly on the screenshot, which is useful for emphasizing specific areas or adding notes. The Highlighter tool can be used to bring attention to important information by highlighting it in a chosen color. Additionally, users can insert shapes and emojis to further clarify or add context to the captured image. Once the desired annotations have been made, the updated screenshot is saved, ensuring that all modifications are preserved for future use.
Using Snipping Tool for Quick Edits
With the Snipping Tool, users can easily make quick edits to their screenshots before saving or sharing them. After capturing the desired snip, the user can access various editing options. Cropping tools allow for the trimming of extraneous parts of the image, enabling users to focus on the essential content. Furthermore, the Snipping Tool allows for alterations in image size and orientation, giving users control over how their final screenshot appears. For those who require more comprehensive editing capabilities, the option to edit the snip in Paint is also available. This feature expands the possibilities for visual enhancements and allows users to apply more intricate adjustments to their images.
By employing these editing functions, users can create polished and professional-quality screenshots that meet their specific needs. Whether for presentations, instructional guides, or personal use, the Snipping Tool stands out as an efficient solution for capturing and refining screen content.
Saving and Sharing
Saving Snippets in Different Formats
After capturing a screenshot, users can save it in various formats to meet their specific needs. The Snipping Tool allows users to select the “Save as” option, where they can choose a file name, the desired location, and the format in which to save their image. Common file formats include PNG and JPEG, with PNG being preferred for images that require high quality and JPEG suitable for standard images with smaller file sizes. This flexibility in saving options ensures that users can manage their captured images based on their intended use, whether it is for professional presentations or personal records. Additionally, it is crucial for users to be mindful of their chosen file type as some formats may lead to larger file sizes, potentially affecting storage space and ease of sharing.
Sharing Screenshots via Email or Messaging Apps
Once users have saved their screenshots, they have multiple convenient ways to share them with others. The Snipping Tool offers a sharing option, allowing users to click on the “See more” menu in the upper right corner of the application to access sharing functionalities. Users can choose to share their captured snippets directly through email, utilizing the default email application to populate the recipient fields with the selected image attached. Alternatively, users can leverage messaging applications where pasting the screenshot into a chat window is a quick process. By using simple keyboard commands such as Ctrl+V, users can insert the screenshot into the message body, streamlining the sharing process. This capability is especially beneficial in collaborative environments where sharing visual information enhances communication and understanding among team members. Furthermore, sharing through social media platforms is also possible, with the option to upload the saved images directly from the file directory. This enhances accessibility and encourages users to engage with their networks by showcasing their captured moments or important visuals efficiently. Overall, the Snipping Tool simplifies both the capturing and sharing processes, making it an essential utility for individuals seeking to communicate effectively through visual content.
Additional Tips and Tricks
Customizing Snipping Tool Settings
Users can enhance their experience with the Snipping Tool by customizing its settings. Within the application, one can modify various preferences to tailor the functionality to their specific needs. For example, users have the option to change the default snip mode that appears when they open the tool. By choosing a preferred mode—such as full-screen, rectangular, or free-form—users can streamline their workflow and capture screenshots more efficiently. Additionally, enabling features like the delay function allows users to set a countdown timer before taking a snip, which can be beneficial when capturing drop-down menus or pop-ups.
Another important setting in the Snipping Tool is related to save locations. Users can configure the default folder for saved screenshots, making it easier to find their captures later. By controlling where screenshots are saved, users can avoid confusion and improve their organizational system for digital files. Furthermore, opting to include or exclude the URL in saved HTML files is another customization option that helps maintain the presentation of the screenshots in reports or shared documents.
Integrating Snipping Tool with Other Applications
The versatility of the Snipping Tool extends to its integration with other applications, enhancing its utility for users. After capturing a screenshot, users can easily paste their snips into various programs, such as Microsoft Word, PowerPoint, or even email clients. This direct integration allows for seamless sharing of visual content without the need for intermediary steps. By using the clipboard functionality, a screenshot can be pasted directly where needed, saving time during the workflow.
Moreover, users can leverage the Snipping Tool in combination with image editing software. After taking a snip, individuals can choose to edit the image in programs like Paint or Paint 3D. This option provides users with advanced tools for further refining their screenshots, adding text, or applying filters that can enhance clarity or aesthetics.
Additionally, users who create training materials or instructional content can incorporate screenshots directly into their workflow, providing visual aids alongside written instructions. The ability to annotate and manipulate images further enhances the educational value of the materials being produced. Overall, these integration features allow individuals to harness the full potential of the Snipping Tool, making it a critical asset in producing quality content efficiently.


