news
How to Protect an Excel File with a Password in Multiple Ways

If you rely on an Excel spreadsheet to store and organize your work data and digital information, you may sometimes need to protect this file or data table with a password. If it contains sensitive and important data, if it falls into the wrong hands, the outcome will not be in your favor! So it is better to take some time to protect it, either by restricting access to the entire file, or simply preventing anyone sharing the file from making changes to the data, or if you want to block the ability to edit only one data table in the file. Regardless, Excel provides several ways to enforce a password, let me tell you how to use each of them from the lines of this article.
This article was updated on 08/5/2023
First Method: Encrypt Entire Excel File
The most common way to protect an Excel file and enforce a password on the data is through encryption. When someone tries to open the file, they must enter the password to access or edit the content, and if an incorrect password is entered or the password prompt window is closed, nothing will be displayed inside the Excel window. To follow this method, open the Excel file you want to protect and click on the File section at the top and choose Info from the left-side menu. Then on the right side, click on the dropdown menu of Protect Workbook. Now you will see several options to protect the file, such as specifying what people can do with the file, or encrypting the file which is what we need to do, so you will click on the second option called Encrypt with Password.
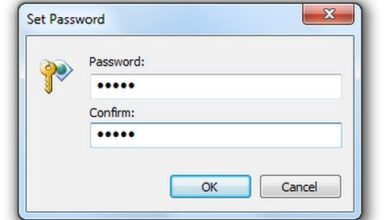
A window Encrypt Document will appear where you will enter the password you want to enforce on the file, try to enter a password that is easy to remember because if you forget this password, you won’t be able to access the contents of the file at all. You will need to re-enter the password a second time to confirm.
After that, the next time you open the file, a popup window will appear before displaying any content where you enter the password to continue. This window will appear to anyone from any computer trying to open the file. Later, if you want to remove the password, all you have to do is follow the same steps, but after clicking on Encrypt with Password option, leave the input field blank and press OK to decrypt.
Read also: How to protect specific cells from editing in an Excel file
Second Method: Allow Read Only Access
The first method is very good at preventing unauthorized individuals from accessing file content if it contains extremely important and sensitive information. However, there is also another option to protect an Excel file, which is to make the content read-only and restrict editing. Anyone can open the document, but will require to enter a password if they want to make changes to the file. This is very easy to do, all you have to do is open the file and click on the File section and choose Save As from the left-side menu. When the next popup window appears, select the location where you want to save the file after applying protection, and give it a name. The important thing here is to click on the dropdown menu Tools and choose General Options as shown in the image above.
This will open another popup window with some optional choices. You can set a password through the Password to open field if you do not want to display the content until this password is entered. Or set a password through the Password to modify field if you want to prompt the person to enter this password when they want to make changes but the content will be displayed normally without restrictions. You can also activate the Read-only recommended option if you want Excel to display a warning window after entering the password indicating to the person to choose between opening the file for read only or for editing. In any case, it is preferable to only enter a password in the Password to modify field and press OK to save the file.
After making the changes mentioned in the above lines and saving the file. If you try to open it later, a window will appear like the one shown in the image, asking you to enter the password if you want to make edits to the file, but if you do not know it, press the Read Only button to display the content immediately.
Third Method: Protecting a Single Worksheet
If your Excel file contains more than one worksheet, you may want to restrict editing privileges to only one or more sheets, not all included worksheets. This means that anyone can view the content and make edits to it but on specific pages, they will not be able to edit the content unless they know the password you set. To do this, open the file and go to the worksheet you want to protect, then go to the Review tab and click on the Protect Sheet option. You will see a list of all actions you can allow others to do without a password unless you place a checkmark “✔” next to them. From the same window, set the password you want to enforce through the Password to unprotect sheet field and click OK.


